
Contemplating Crown
As you are all aware, I am a list/get-er-done type of gal. Since we paid for getting the tree down and out, our home improvement budget is back to growing at a steady pace. We typically try to put $100 each paycheck into the home improvement budget. When we are saving for something larger, we put up to $300 into the fund. I try to balance bigger projects (tree removal, wall removal, tiling a bathroom floor) with smaller ones (crown, board and batten in the hallway, redoing the table). One big, one little. Small victories and then a big one. It's like... uhhh... a lopsided teeter-totter? I don't know. It's just the way we do things. Anywho, I REALLY want to get crown up in the house and the only way this is going to happen is if I plan it all out, have the materials list, and force LB to like math. That last part is a total joke, because the man will never like math, but perhaps the progress will soothe his hatred. (hahahhahaa. He's gonna hate this project).
Planning Out What Kind and Size of Crown
"Little? Big? Little? Big? I don't know!" -Thanks How to Lose a Guy in 10 Days.
This Old House Says:
Play off the existing trim. Look to your baseboards and door and window casing to determine the right scale. An appropriately sized cornice is either the same height as, or slightly smaller than, the baseboard.
Measure the ceiling height. Ceiling height is the ultimate arbiter of size, according to architect Richard Sammons, coauthor of Get Your House Right. For standard 8-foot-high ceilings, the crown/cornice height should be 2½ to 6 inches; for 9-foot ceilings, 3 to 7½ inches, and for 10-foot ceilings, 3½ to 8 inches.
So we thought we would always just go bigger for crown, because bigger is always better right? WRONG! We brought home these two pieces of crown as samples and quickly saw that the chunkier crown made the room look A LOT shorter. No bueno.
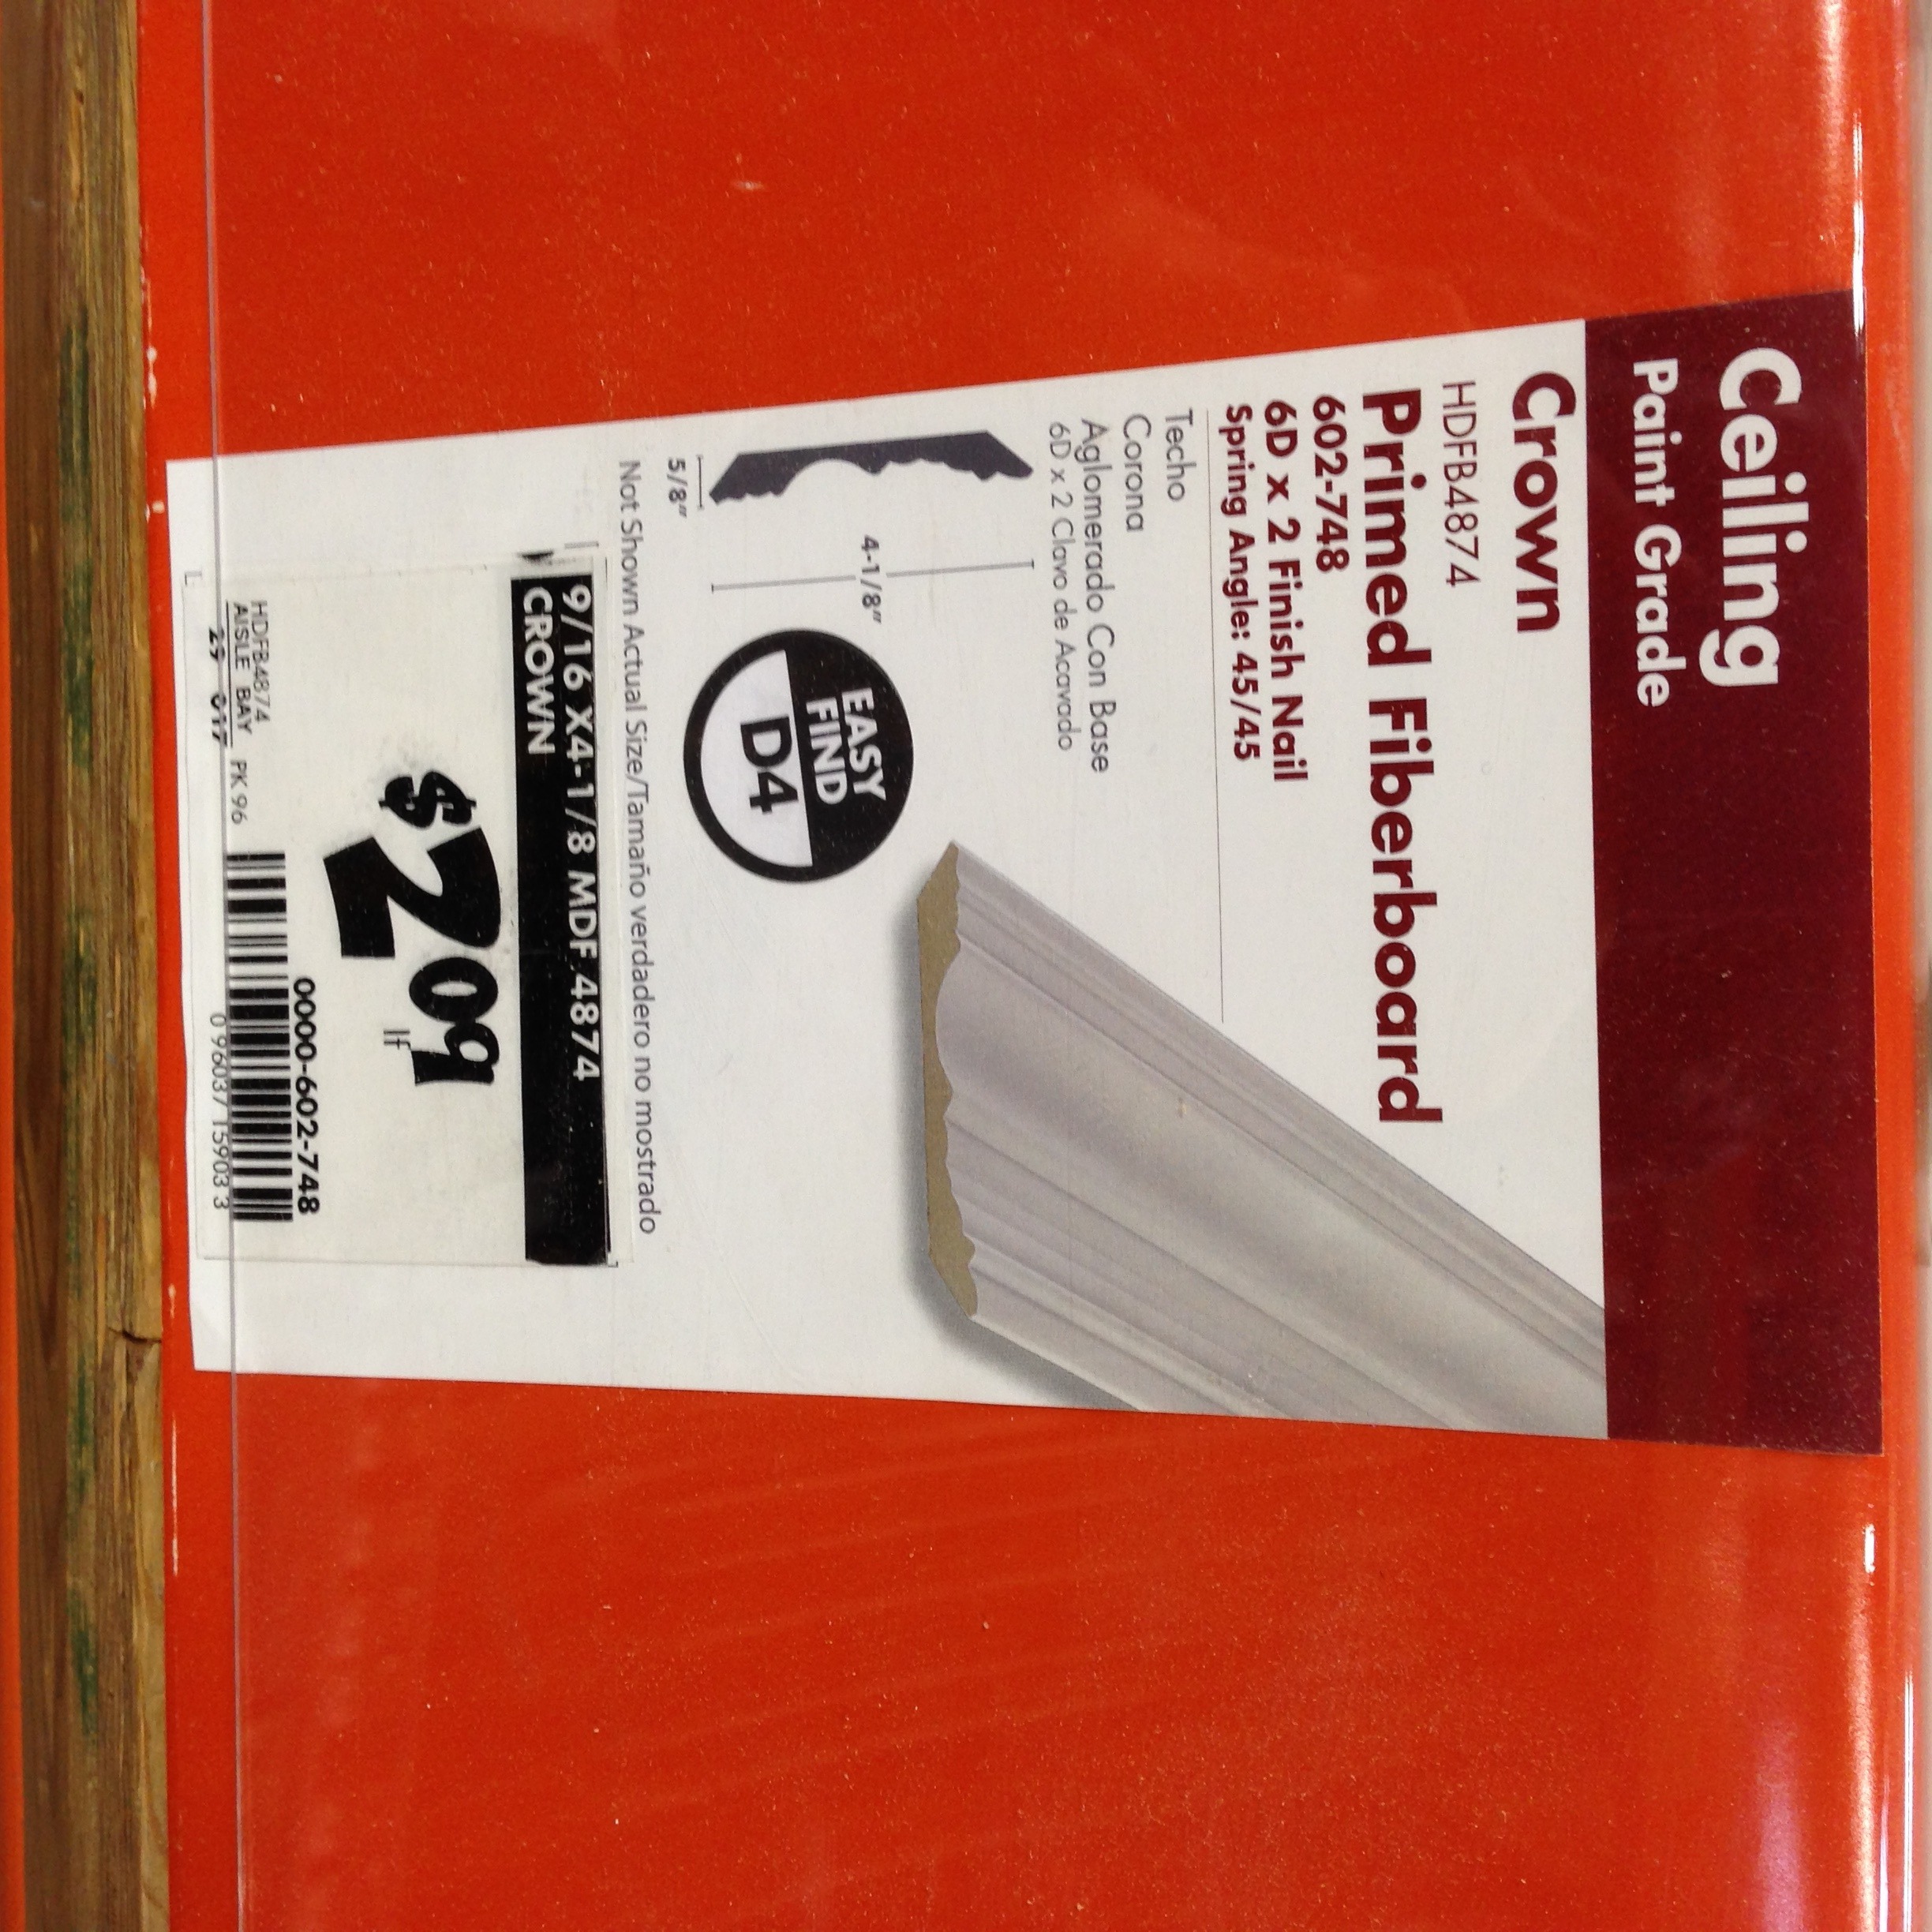
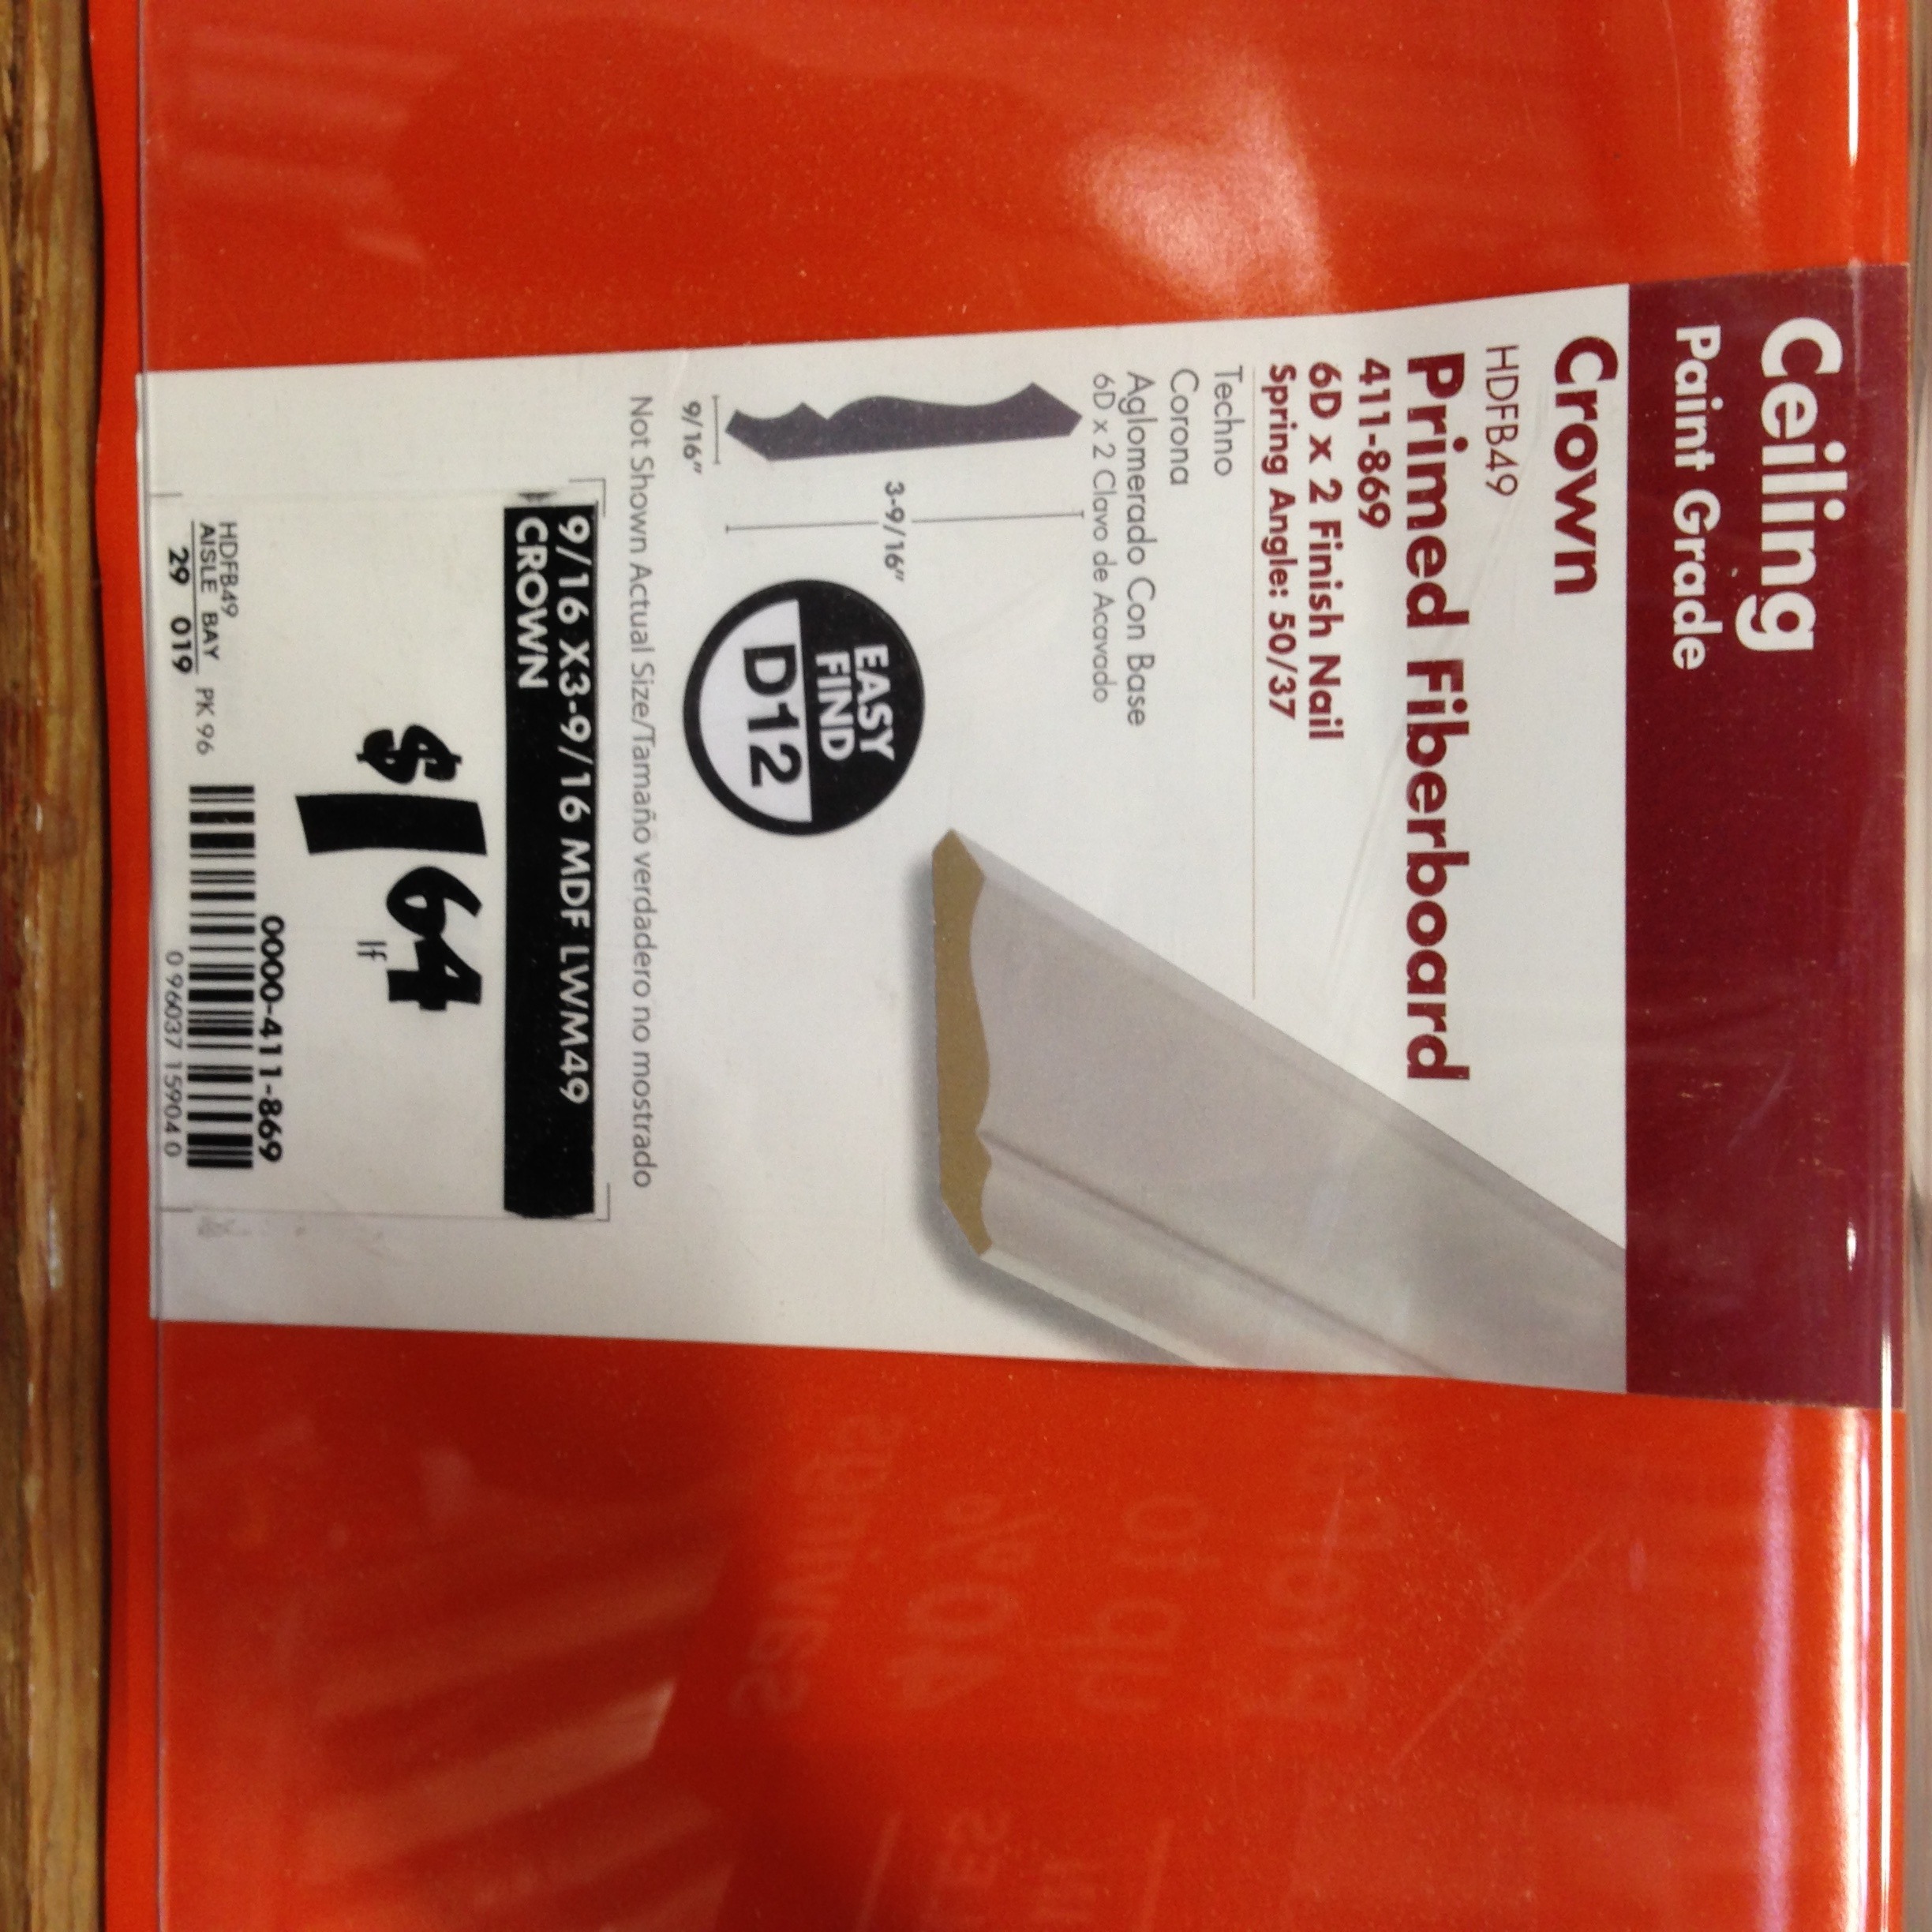
Since we are going to be crowning the entire first floor, we are going to get the cheaper bulk pack of crown from Home Depot. It's about $1.09/foot and each bundle contains 60 feet. Once we measure it out and add in the extra pieces for mistakes, I think we will be golden going in bulk. Originally, we were worried that the bulk back would be too skinny, but, alas, our samples indicated otherwise. Go team!
The how-tos:
This is where the wheels come off potentially. First, let's start with definitions from This Old House.
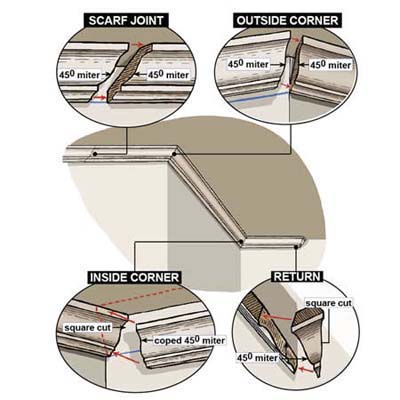
With the corners and the angles that determine said corners, we are counting on our Kreg Crown Jig. It helps you measure the corners and then set your saw. For $30, I am thinking it is totally worth it.
We are also relying on our friends at YHL (I miss that website so much. Come back wonderful DIY-ers COME BACK!). Their video and picture tutorials are just the thing that us first timers really need. I am thinking I can trick LB into watching the video by saying it's the video for the new Mumford song. Should go over well.
The Actual Hanging
So once it's all cut perfectly, we are going to use our pressurized nail gun and nail it up there! Then caulking and sanding and painting with Benjamin Moore’s Decorators White in a semi-gloss finish. I acknowledge that this means I will likely have to repaint all of the baseboards, but c'est la vie. The paint must match. At least it'll be a good reason to do the board and batten in the hallway at the same time. DOUBLE THREAT GUY. (<-- name that movie. Hint: Jim Carrey).
That's the plan to tackle something that seems pretty scary. Plus, it's gonna be good motivation to get my shoulder all healed up. What scary project have you thought about tackling lately? Does planning it out like this help you or am I a crazy person?

